Tuesday, December 29, 2009

Cute Marshmallow Snowman

I have been wanting to make marshmallow snowmen with Emily for some time now, and when I mentioned it to her, she instantly adored the idea of making a snowman out of marshmallows!


We used jumbo marshmallows and pretzel rods. Push three marshmallows through one end of the pretzel rod, and stack them together to make your snowman.


Add pretzel stick arms. Emily made hers wave to the camera.


Use writing icing for the eyes, mouth, and buttons.


Attach a chocolate kiss with some more icing for the snowman's hat.


Oh, dear! It wasn't long before our cute marshmallow snowman became a scary headless snowman! Ahhhh!!!


Enjoy and have fun!

Monday, December 28, 2009

Top 9 Posts of 2009 Round Up

Some of our very favorite posts for 2009:

Sunday, December 27, 2009

Sunday Snapshot -- All Dressed Up (Sort of)

Almost a year ago, I had found these beautiful holiday dresses for both of the girls at our local thrift store. The girls wore them to my parents' house for Christmas dinner, until my brother gifted Clara with an adorable monkey bathrobe and sock-monkey slippers. She LOVES them. The minute she saw them, she made it quite clear that she wanted to try them on. And while you can't see it in any of our holiday photos, I swear she is wearing a cute holiday dress under that robe!!


I thought she would wear them for a few minutes, then take them off. But noooooooo! She's been wearing that robe for about 3 straight days, and cries like you're ripping her arm off if you threaten to change her into anything else. The only reasons it has come off were for a few minutes yesterday (she had an apron on so she could paint), for baths, and for sleeping. In the morning, the robe goes right back on!

I haven't done it yet, but I'm considering taking her to the grocery store with it on. It's either that, or deal with incessant screaming in protest.

Hey, you pick your battles.

Saturday, December 26, 2009

Art So Easy, A Toddler Can Do It

We had so much going on during Christmas, that I thought the girls could use a little break from all the chaos today. Clara, in particular, seemed to be a bit over-whelmed with it all. So when Emily was off playing with all her lovely new toys, Clara and I snuck in a quick painting project. It was the perfect way to calm her (and me) down.

This snowflake painting was done using a similar technique to our stunning Winter tree paintings, only this one was even easier. It was so easy, in fact, that Clara did it with great results!


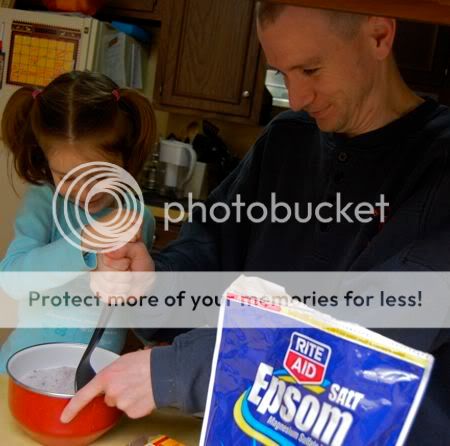
To make your own snowflake painting, you will need: light blue, dark blue, and purple paint, masking tape, and canvas board (very inexpensive).

First, make an "X" in the middle of the canvas board with masking tape.


Next, add another line of masking tape bi-secting the "X" as shown.


Add a few bits of masking tape on each end of the snowflake.


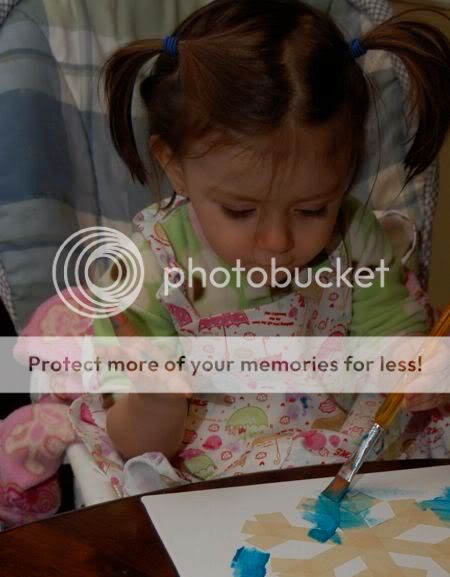
Invite your child over to PAINT!!! Extra bonus points for painting in your pajamas.


Encourage your child to cover the entire canvas board with paint.


Lots and lots of paint!


Now, allow the paint to dry completely.


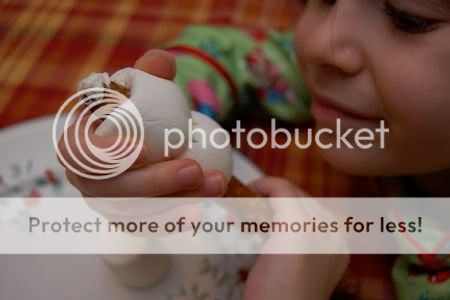
When the paint is completely dry, gently peel off the masking tape.


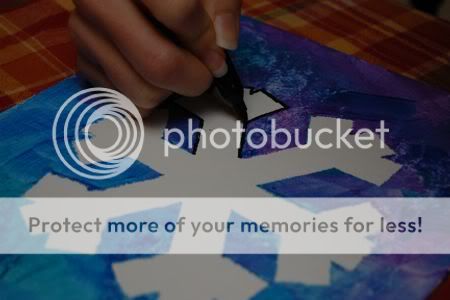
Use a black marker to outline your beautiful snowflake.


Ta-da!


Display proudly in your home!

Thursday, December 24, 2009

Christmas Eve

It is 11:33 PM on Christmas Eve. There has been much gift wrapping, card writing, decorating, stocking stuffing, tree trimming, and other such activities going on.... and so much more left to do! Wishing you and your family a very Merry Christmas.

Tuesday, December 22, 2009

Handmade Holiday -- Meet Butter!


This sweet kitty cat was a late night sewing project I made using this free pattern found on Wee Wonderfuls, and I wish you could have seen the look on Emily's face when she first saw him! She immediately named him "Butter", and they have been enjoying many adventures together this morning.


Butter's made from a vintage pillowcase, some felt, stuffing, and 2 buttons for eyes. I even attached a little jingle collar, so Emily will be able to keep track of him, should he wander off on his own. The pattern only calls for 1/4 yard of fabric, so it's a good way to use up scraps. Val in the Rose Garden might recognize this fabric, since it came as part of this wonderful surprise package she mailed us. (Thanks, Val!)


Butter is so brave! Sometimes he climbs the back of the sofa and pretends to be a mountain lion!


Meow!!

Sunday, December 20, 2009

Handmade Holidays -- Scented Bath Salts


It's not too late to make some last-minute handmade gifts for that special someone on your list who is in need of a little pampering... (hint, hint). Mark and Emily whipped up a batch of lavender scented bath salts and it only took a few minutes!

To make your own scented bath salts, you will need: lavender essential oil (or whatever scent you prefer), food coloring, epsom salts, a mason jar, and some ribbon.

Begin by mixing the food coloring in a separate small bowl. We used 6 drops red food coloring and 4 drops of blue. Sorry kids, but this is a grown up job. Please note: be careful with food coloring as it will stain the dickens out of anything it comes into contact with (including counter tops).


To that same bowl, add about 3 drops of essential oil. Emily thinks lavender is a lovely scent, so we went with that. Again, this is for the grown ups only. I'll refrain from divulging about the time some essential oil spilled on the furniture and it took the finish off, but please be careful!


To a larger glass mixing bowl, add 2 cups of epsom salts.


Combine the essential oil/food coloring mixture to the epsom salts.


Stir the crap out of it!!! Keep stirring until everything is well-combined. This may be a two person job.


Spoon into mason jars. Close jars and tie on some ribbon.


Hmmm.... I wonder who we could give this lovely gift to??


Ahem!

Saturday, December 19, 2009

Adventures at the Beauty Academy

The girls were long overdue for haircuts, and despite my frugal nature, I have resolved to never EVER attempt to cut their hair myself. Too many horror stories, and I simply cannot bring myself to do it. That's not to say that salons are always perfect. One instance involving Emily's haircut a few years ago that ended in bangs despite my explicit request for NO BANGS comes to mind. You have no idea how long those took to grow out. It must have traumatized me because now every time she goes to get her hair cut I am overcome with the urge to scream "FOR THE LOVE OF GOD AND ALL THAT IS HOLY, NO BANGS! NO BANGS!!" while grabbing the hairdresser by the shoulders and violently shaking her.

Thankfully, I show great restraint during those moments, but make the seriousness of my request known by extending the length of the "no". As in, "Yes, a trim would be perfect. Chin length is great. (pause for effect) Noooooooo bangs!". Smile. "Thank you so much!"

So far, so good!

I realize I'm a control freak, but seriously, have you ever had a hairdresser not listen to you? Do you have any idea how frustrating that can be?? It's like your entire LIFE for the next 4 or 5 months is resting in their hands! Do they even realize the POWER they have???? It makes me tremble with fear, just thinking about it.

A friend of mine (Hi, Kim!) told me about a local beauty academy, and after seeing how awesome her new hair style looked, I just knew I had to give this place a try. For all three of us to get our hair cut, is no small feat. First, Mark needs to be there to supervise the girls while my hair is being cut. Someone needs to make sure no bangs are being cut. Lastly, someone needs to distract Clara during her FIRST haircut EVER so she doesn't whip her head around and get her eyes poked out with a pair of scissors.

We did quite well!

The beauty academy was fabulous (and very frugal)! When word got out that it was Clara's first hair cut, I thought they were going to fight over who got to cut her hair. She had two hairstylists working on her at the same time, while a third went to fetch an envelope to keep her hair trimmings in. So much attention for one little girl!


Ta da!!

Meanwhile....
Emily was thoroughly enjoying all this pampering! What a treat! Rachel did an amazing job with her haircut, and NO BANGS!! Hooray!!!!

Thank you, Alison, Rachel, and Samantha for our lovely new 'dos -- just in time for the holidays!

Friday, December 18, 2009

Gifts Kids Can Make -- Chocolate Nut Bark

I found this recipe for Chocolate Nut Bark in an issue of Real Simple magazine, and it's so simple and easy -- a five year old can do it (with a bit of supervision). That's my kind of "baking"!

To make your own, you will need: one 12 oz bag of semi sweet chocolate chips and about 2 cups of mixed nuts (ours were salted & roasted).


Melt chocolate chips in a double boiler. We like to add ours a little at a time.


In the meantime, ask someone to spray a 13 x 9 inch pan with non-stick spray. The recipe says to line the pan with parchment paper, but we don't keep that in this house due to the lack of actual baking. So we used non-stick spray instead. It worked! Man, I am soooo good at this.


Spread chocolate out evenly. Five year olds can do an exceptionally thorough job with this step.


Sprinkle mixed nuts over top!


Place in the refrigerator to harden up (about 30 minutes). Break into pieces, and place in a wax paper lined box.

Yummy!!

Thursday, December 17, 2009

5 Little Snowmen Play Set

Last year, my friend Erin and her two little girls taught Emily the Five Little Snowmen song. I had never heard it before, but it became an instant favorite of Emily's and was sung over and over again in our household many times during the Winter months.

To go along with the song, I made a little play set out of felt. Emily loved re-enacting the song, building the snowmen, and then letting the sun come out to melt them all one by one. She especially loved building crazy snowmen all out of order and thought that was hilarious!


I cut out the shapes, and drew the eyes, nose, mouth, and buttons on each snowman with a Sharpie. Easy!


Emily's internet singing debut!!!


Five Little Snowmen

Five little snowmen, fat!
Each with a funny hat.
Out came the sun,
and melted one.
What a sad day was that!

Thank you, Erin, for sharing this fun song with us!
Related Posts with Thumbnails