Wednesday, March 31, 2010

Quick Craft -- Bunny Handprints

Emily loved making this adorable bunny handprint this afternoon, and I think Clara will want to do one when she wakes up from her nap too! It was a super quick and easy project. I'll be making color copies of them to turn them into Easter greeting cards!


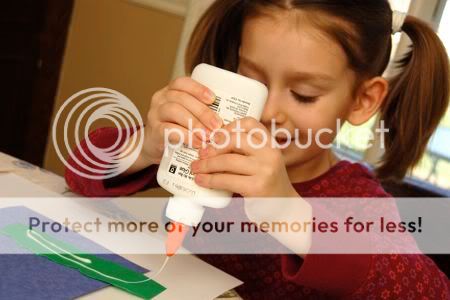
To make your own, you will need blue and green construction paper, white paint, a paint brush, and a black marker. Have some baby wipes or paper towels on hand too!

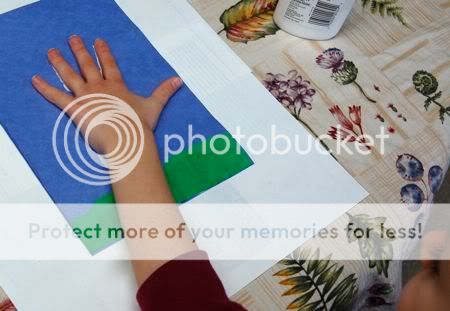
I tore a piece of green paper to form the grass for the picture, and invited Emily over to glue it down on the blue background. I didn't have to twist her arm!


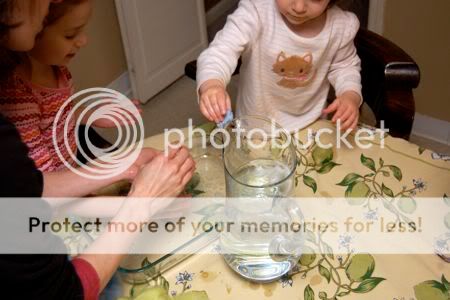
Next, I painted the palm of her hand with white paint. This forms the body of the bunny. Emily pressed this down firmly on the paper to make a good print.


To form the bunny's head and ears, I painted Emily's palm, first, and ring fingers with the white paint.


Press down to make a good print!


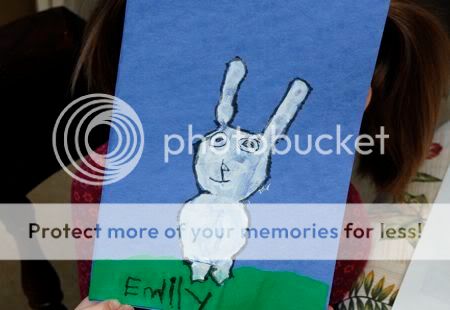
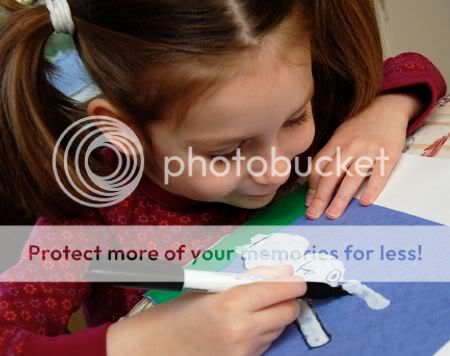
Once the paint is completely dry, with a black marker, add the bunny's eyes, nose, and mouth.


Add an outline around the entire bunny, and don't forget to sign your artwork!


Why buy greeting cards when making your own is this much fun??

Tuesday, March 30, 2010

Felted Easter Eggs

The girls and I had so much fun making these CUTE felted Easter eggs! To make your own, you will need some wool roving. If you have trouble finding wool roving, you can purchase it online here.

Start by filling a pitcher with some very warm water, and add a few tablespoons of dish soap.


Stir up the water in the pitcher until the soap is well-combined.


With a small amount of wool roving, get it wet and start rolling it into a ball in the palm of your hand. Clara was eager to keep up with her big sister, and with just a tiny bit of help from Emily, she was able to make a few eggs of her own.


Add more wool roving, bit by bit, until the egg is the desired size. Add stripes or dots to your eggs, make them multi-colored! Go CRAZY with your wild egg designs!


Once your felted ball is the right size, gently shape it into an egg shape.


Wow!! This is so much fun!!!


I see some felted Easter egg hunts in our future!


So pretty! Added bonus -- kids with clean hands!

* This post contains affiliate links.

Monday, March 29, 2010

Easy Spring Mural

A few days ago, I bought a package of flower-shaped Post-Its. We couldn't resist making an inexpensive no-mess Spring mural with them! While Clara was napping this afternoon, Emily helped me take down the four leaf clovers in the sewing room and replace them with colorful flowers! One pack of Post-Its comes with three different colored flowers. We used color coding labels for the centers of the flowers.


Using a cheap roll of craft paper, I cut out the shape of a tree branch, and used masking tape to hold it to the wall. Emily had a go at it with the pink flower-shaped Post-It notes. She kept adding more and more flowers....


I think it turned out quite nicely...


...and it helped brighten up an otherwise rainy afternoon!

I added this post to:

and

Sunday, March 28, 2010

Sunday Snapshot -- Egg Hunt Fun


Wishing you and your family and fun-filled weekend!

Friday, March 26, 2010

Frugal Family Craft Fail: This is awful, and you should feel bad for doing it

Mark here. With this project, Valerie and the girls were not repurposing all of my stuff but...

Things don't always go according to plan, even at the Frugal Family Fun house. Sometimes crafts don't turn out like they were supposed to. You might call them "awful", if you are being nice.

Valerie and Emily were attempting to make a "Scratch-n-Sniff" rainbow for St. Patrick's Day. Here is how NOT to do it.

Step One: Paint a canvas with water...


Step Two: Sprinkle some red unsweetened powdered drink mix on top.

Step Three: Repeat with all of the colors of the rainbow

Step Four: Make some (hideous) Bacon????? Emily got a big kick out of this.


Wow. That was awful, and you should feel bad for making it. Color blind people could do better. This is seriously the saddest rainbow I have ever seen. It goes "blood red, bright red, burnt red, toilet stain (if you are generous) and cajun".

Does it smell nice? No. It smells like some sort of mutant fruit. Not a good mutant fruit either. (I'm looking at you, Grapple!)

My suggestion? Try to recycle it. However, even the recycling company will not take it, and it will be left at the curb for animals to peck at and get sick.

Forget this! Let's go play Invisible Basketball instead!

I hope you enjoyed "Frugal Family Craft Fail" Of course, none of this was Emily's fault. Craft failures happen all of the time -- you won't know what works unless you try!

Thursday, March 25, 2010

Flowers as Canvas

Our Star Magnolia tree is just starting to bloom with beautiful white blossoms.


We trimmed some of the branches, and placed them in a vase. The girls LOVED coloring on the white petals with bright markers! Art and nature ....combined!


Clara took this coloring job very seriously. It's hard work, being a crafty toddler, and all!


She did a lovely job, don't you think?


I love Emily's multi-marker approach -- the blossoms looked like they had been splatter-painted!

I was surprised how well the blossoms held up to all that coloring. So much fun!!

Wednesday, March 24, 2010

We're Featured for Work of Art Wednesday!


Today we were featured at Mommy Moment, where we shared this fun Spring craft project for "Work of Art Wednesdays"! You can see how we made it here!

Thanks for featuring us, Jody!

Tuesday, March 23, 2010

Flower Prints from Soda Bottles

Another rainy day here, and the girls were starting to go through a bit of "messy art withdrawl". We made flower prints using empty soda bottles! In our case, they were empty seltzer water bottles, but you get the idea.

Clara really got into the painting today! She could hardly contain her excitement!


In mind, were similar prints I had seen on various blogs, but had forgotten about until I spotted a few empty bottles in our Invention Kit.

To make your own flower prints, roll out some freezer paper. Dip the bottom of an empty soda bottle into some paint, then stamp on the paper. Rotate the bottle around to make even more petals!


Dip the bottle cap into some paint and it makes a great stamp for the centers of the flowers! The girls took turns stamping with the cap and the bottle. So much fun!


They look so bright and cheerful!


Bonus points for drinking imaginary water from your empty bottle!


EXTRA bonus points if your face is smeared in paint!


I added this post to:

Monday, March 22, 2010

Crazy Weather Pictures

We've had a lot of crazy weather here lately. One day it's warm and sunny, and the next (like today) is cold and rainy. So we made some crazy weather pictures!


To make your own, you will need a clear sheet protector (very inexpensive), some wipe off markers, two binder clips, and some markers or crayons. Invite your child over to draw with the markers or crayons on a sheet of white paper. Emily has had birthdays on the brain lately, so she drew a picture of Grandpop's birthday and everyone giving him big presents!


Next, layer a clear sheet protector over the top of your child's drawing. Use binder clips to keep the sheet protector in place. With the wipe-off markers, have your child draw rain drops, snow flakes, hail, sunny rainbows, or whatever crazy weather you want, on the sheet protector.


Now you see it....


...now you don't! Erase the wipe-off markers, and repeat again with a different weather pattern!


Take that, crazy weather!

Sunday, March 21, 2010

Sunday Snapshot -- She's Six!!!

Friday, March 19, 2010

Story Stones and Sidewalk Scenes

For some cheap creative fun, draw on some rocks with a fine point permanent marker to make your own story stones. Once your characters and props are all made up, take them out to your driveway and.....


....with a little chalk, draw up some scenery for your imaginative story!


Emily loves to make up stories, so this activity kept her busy for a very long time. We had quite a tale going on here, involving lost kites, fire trucks to the rescue, and boats that fell over the edge of a very high waterfall. The drama! The excitement!


Of course, there were also trips to Grandma's house, some minor fender benders, and one accident involving a car driving through a house. Thankfully, no one was seriously injured.


Emily asked if she could go back outside to continue with her story after dinner. She won't have to twist my arm.


Have fun!!
Related Posts with Thumbnails