Wednesday, September 30, 2009

Indoor Herb Garden Update... Sprouts!

When we woke up this morning, we were greeted by these.....


.... sprouts of basil from our indoor herb garden!! To celebrate, we read the book Seeds! Seeds! Seeds! by Nancy Elizabeth Wallace. What a fabulous find this book turned out to be, and I highly recommend it if you have any junior gardeners in your household!


Then, we decorated picture frames by gluing beans to them. (This activity came straight from the book above.) There are so many fun gardening activities mentioned in this adorable story. Emily loves gluing things, so this was really fun for her!


We're looking forward to more sprout celebrations soon!

Tuesday, September 29, 2009

Sewing in Baby Steps... an Update!

Sorry, the free daily emailed version of this workshop is no longer available. You can still, however, download the entire workshop in a Workbook format here for $5.95.

The first session of the Sewing in Baby Steps Workshop received such great feedback, but so many of you wanted to join in and missed the registration deadline. I think everyone should learn how to sew! Thankfully, we've developed a new and improved system for our workshop that allows for simultaneous registrations with no end date! Hurray!

Feel free to blog/tweet/facebook and tell all your friends who couldn't make the last session's deadline that they can now come back to register for this ongoing session.


The workshop is 13 days long and each day you will receive an emailed "baby step" task to do, along with detailed instructions on how to complete the task. By the end of the workshop, you'll have sewn a reusable drawstring produce bag and a matching grocery tote! More importantly, you'll be well on your way to completing other sewing projects on your own. For more information on the workshop, click here.

Also, the Sewing in Baby Steps Workshop is now available as a downloadable workbook for $5.95. You can choose to download the entire workshop at once, to complete at your own pace, or sign up below for the free version of the same workshop to be emailed to you one "baby step" each day.

You will also be invited to join our Google Group where you can ask questions, upload photos of your finished projects, and discuss the tasks in further detail -- not only with me, but also with each other. Fun, right?

To sign up, fill in your name and email address in the form below. You will receive a confirmation email to verify your registration, and your first task will be emailed to you the following day. Let's get ready to sew!

Monday, September 28, 2009

Junior Stamp Collecting

This little gem of an activity was inspired by a recent package that arrived for Mark all the way from Hong Kong. Emily was enthralled with the stamps, so I thought I would introduce her to my old stamp collection from when I was a kid. My dad has a much larger collection, so it must run in the family. Stamps have since have become her tiny treasures, and she takes excellent care of them.

To start your own stamp collection, first cut the envelope around the stamps. Soak in very warm water for a few minutes to allow the adhesive to come loose. Gently peel the stamp off of the envelope with tweezers, and transfer to a paper towel with the printed side facing down.


Allow the stamps to dry completely, and then add to your stamp book. You can use hinges like these, or collectors binder sheets like the ones we used. There is even a Beginner's Stamp Collecting Fun Kit!


This is a great introduction to world geography, and a super-frugal hobby for just about anyone. You can bet we'll be keeping a close eye on our mailbox for any unusual stamps!

Sunday, September 27, 2009

Sunday Snapshot -- Puddle Jumper

Jumping in puddles is so much fun...


...even more so when Mom jumps in too!


Saturday, September 26, 2009

Eliminate Plastic Bag Clutter with this Easy Craft


We recently borrowed Ed Emberley's Picture Pie (Ed Emberley Drawing Books) from our local public library, and it inspired this quick project for a plastic bag organizer that uses an empty tissue box!

We used a large circle cutter to cut all the pieces quickly and easily. Then Emily chose a design from the book and copied it by gluing down the pieces of construction paper on the side of the box. This activity encourages fine motor skills, since she could only use tiny dots of glue on each piece.


She was so happy with how it turned out! She couldn't even wait for the glue to dry before stuffing it full of plastic bags.


Geometric designs are very appealing to Emily now (see here), so I have a feeling we'll be doing more projects from this book! Plus, now our plastic bags are so organized!

Friday, September 25, 2009

How to Make Tissue Paper Flowers

We make tissue paper flowers on a regular basis in our household, and I've blogged about them before here and here. We have even been known to make spontaneous deliveries of these to our local assisted living center! During the Fall and Winter months, they can be a nice reminder of warmer weather, and they always look so bright and cheerful! I thought I would share our tissue paper flower technique with you. It's very easy!

First, cut 3 sheets of tissue paper about 5 x 7 " or so (you can just eyeball it). Begin folding the shorter end accordion style with folds about every 1/2 inch.


Gather the center of the flower by wrapping a pipe cleaner around it as shown.


Now, snip the ends of the tissue paper to make points. This will give the petals a nice shape.


Carefully separate the layers of tissue paper....


And enjoy your beautiful flower! We've sprayed ours with a little perfume to make them smell nice too.

So bright and cheerful, and very frugal!

Thursday, September 24, 2009

Indoor Herb Garden

Starting this indoor herb garden was such a fun project for Emily and me, and we are especially looking forward to having some fresh basil to add to our homemade pizzas! Thanks to a few items from Target's $1 section, this was very inexpensive and surprisingly not nearly as messy as I had anticipated.

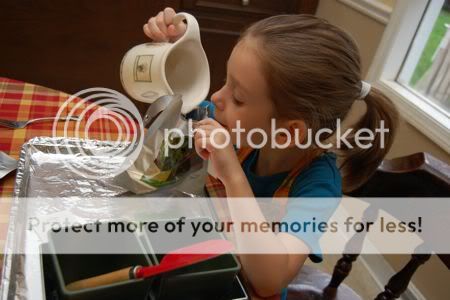
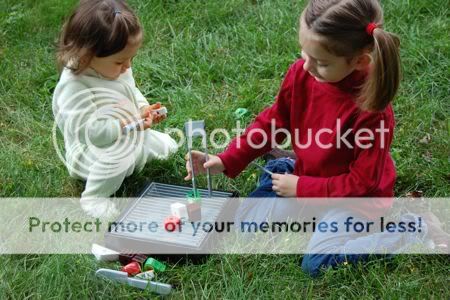
The seed packets we chose came with a soil pellet and you could start the seeds right in the bag! We opted for some inexpensive planters (also from the dollar section), and some recycled YoBaby 3-in-1 Meal containers, but Emily did mix the soil pellet with water right in the bag.

She fluffed the soil with a fork, and remarked that the soil was "light and soft".

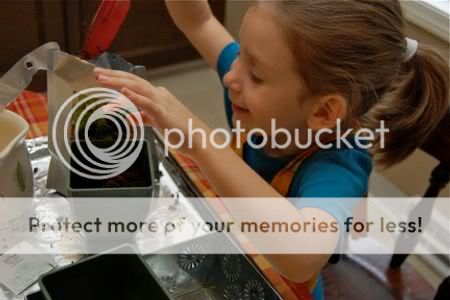
Next, we transferred the soil to the pots with a small hand shovel (also from Target's dollar section). This was Emily's favorite part!

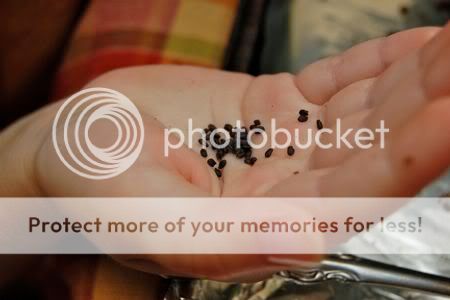
Then, she added the seeds, and covered them with dirt.

And gave them a little bit more water.

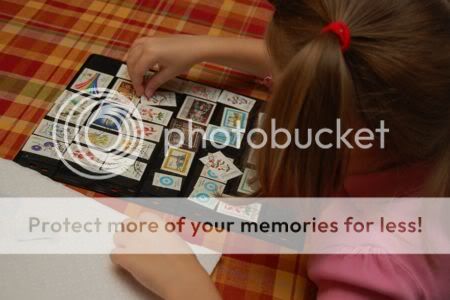
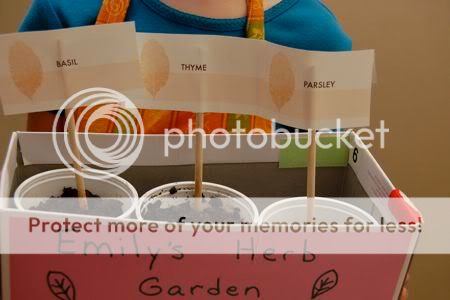
I printed out some seed labels on the computer and Emily attached them to some short dowel rods. Of course, you could also use popsicle sticks, but we are all out of those.


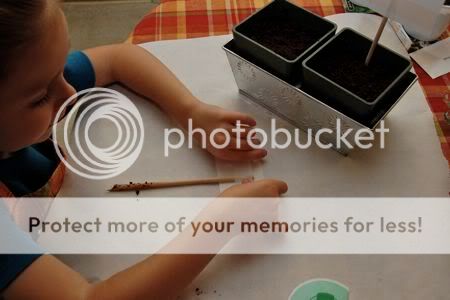
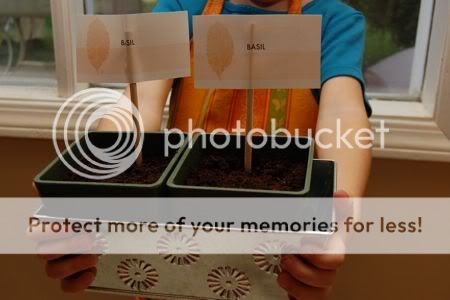
Ta-da!!! Our nifty indoor herb garden!

By the way, Emily's garden apron was made from a tea towel. It has a bunch of pockets for all her kid-sized gardening tools.

Which reminds me... be sure to come back soon for an important update regarding the Sewing in Baby Steps workshop. The second session of the same workshop (slightly improved) is about to begin! You won't want to miss it!

And the winner is...

The winner of the YoBaby 3-in-1 Meals Prize Pack is Mama King from 4 Crazy Kings! Congratulations!!

Thank you to everyone who entered, and if you haven't done so already, be sure to get your entry in for a Melissa and Doug Play Grill Set Giveaway from AllChildrensFurniture.com.

Wednesday, September 23, 2009

Review and Giveaway -- AllChildrensFurniture.com

What a fun review and giveaway we have for you today, sponsored by AllChildrensFurniture.com, which is part of CSN Stores, LLC. AllChildrensFurniture.com features a huge selection of furniture for kids, including kids chairs, toys, games, decor items and so much more! They sent us this adorable play grill set by Melissa and Doug to review, and now you'll have a chance to win one too!


Here's what I love about AllChildrensFurniture.com:
  • Low Prices -- If you see a better deal online, send them an email and they can almost always get you a better price. The frugal side of me loves this!
  • Quality Merchandize -- They have a huge selection of products, and everything is very well-made with a 100% satisfaction guarantee. If for any reason, you are not completely satisfied with your purchase, return it within 30 days for a full exchange, credit, or refund of the cost of the item.
  • Service -- If you have any questions, you can call an 800 number and get this... Never wait on hold!! And talk to an actual person!! Yes!!!!
Now the fun part -- One lucky reader will win their own Melissa and Doug play grill set from AllChildrensFurniture.com, just like this one!


The set includes wooden play food (shown), skewers, tongs, knife, and a play hibachi grill that doubles as a storage container for all the items! Recommended for ages 3 and up, (although my little one enjoyed sharing with her big sister while I was supervising). The back of the grill has some fabulous suggested learning activities that can be done with this set. The girls have been playing with this pretty much non-stop since it first arrived about a week ago, and I was quite pleased with the quality of the product and how fast it was shipped to us!


Giveaway is open to US residents only. To enter, leave a comment on this post and be sure to leave your email address in the comments field. Blog about this giveaway by copying and pasting the HTML code below into your blog or Facebook page. Be sure to come back and leave a comment with the link to your page, and you're in for three more entries! Tweet about it (leave a comment about the tweet) and you're in for three more entries!


Giveaway ends Saturday, September 26th at 6:30pm EST and winner will be chosen by random.org.

Good luck!!

Tuesday, September 22, 2009

Pumpkin Ring Toss Game

If you have a couple of pumpkins and some canning rings, you can put together your own pumpkin ring toss game! Emily enjoyed playing this, and it is challenging. When we played, each canning ring that hit a pumpkin was 1 point, but if we got a ringer around the pumpkin stem, it was worth 10 points!


Clara was happy to put the canning rings over the pumpkin stems and clapped every time. She was so proud of herself!


Then, we attached some ribbon to the canning rings to make dancing ribbon rings. We cranked up the music and danced!


I had no idea canning rings could be so much fun!!

Monday, September 21, 2009

Spooky Spider-Printed Pumpkins

The only one who's crazy about carving pumpkins in our household is Mark. Emily and I would prefer to paint on ours, thank you very much. These spider-printed pumpkins were fun and easy to make! Keep some baby wipes on-hand to keep the mess to a minimum.

To make your own spider-printed pumpkins, you will need some black paint, a pumpkin, a paint brush and some baby wipes.

First, brush some paint on your child's palm and four fingers.


Make a hand print on the pumpkin as shown.


Next, wipe off that hand with a baby wipe to get rid of the paint, and brush your child's opposite palm and four fingers with black paint.


Now, overlap the palm of the first print with the palm of this new hand print.


Allow the paint to dry, and add some googly eyes!

Have fun!!

Sunday, September 20, 2009

Sunday Snapshot -- Facial Expressions

Clara is growing up to be quite the expressive toddler, as evidenced by these photos:

"Who farted?"


"Was it you?"


"Nahhh.... It was me!"

Hope you are enjoying your weekend. More crafty frugal goodness coming up!
Related Posts with Thumbnails