Monday, August 31, 2009

Finger Painting Fun in the Sun, Sun, Sun

Just a quick reminder, today is the last day to sign up for our free online sewing workshop Sewing in Baby Steps.

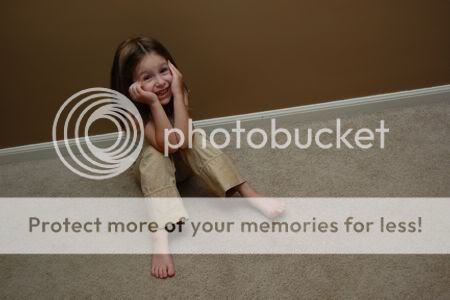
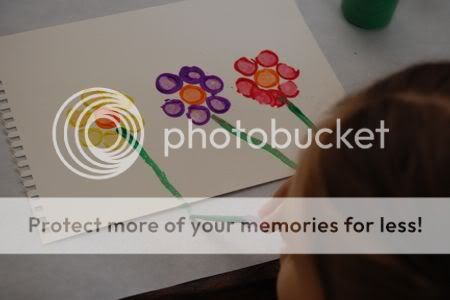
Today, we celebrated one of the last few days of Summer by finger painting Sun pictures!

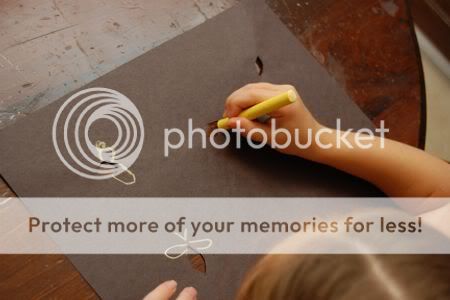
This was a particularly messy project, but a really fun one that both my girls really enjoyed! Since we had such beautiful weather here today, it was perfect for a messy outdoor art project. Both girls wore old T-shirts inside-out, but if that isn't an option, be sure to check out How to Make an Art Smock from a Garbage Bag.
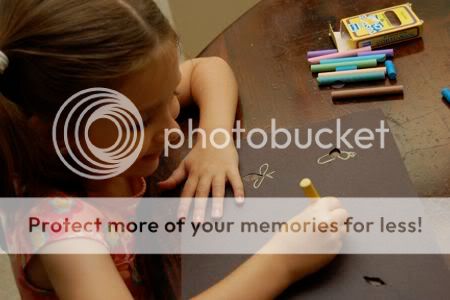
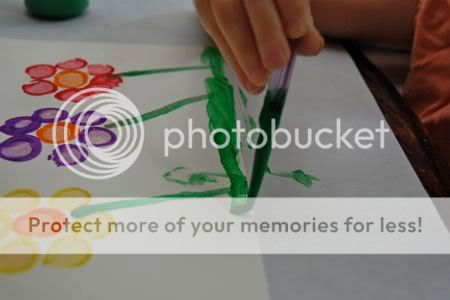
Emily dipped her hand in yellow finger paint and overlapped her hand prints on a sheet of freezer paper to make the sun. Freezer paper is ideal for finger painting, but we have also used sheets of paper cut up from brown paper grocery bags with great success.

Next, she used her index finger to make rays of sunshine. She enjoyed adding bits of red to mix with the yellow to make orange. Extra bonus points for singing "The Sun Has Got His Hat On" while doing this project.

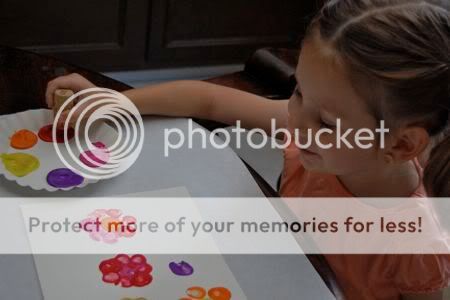
Clara had a lot of fun with this as well. Emily helped get her started, and then.....
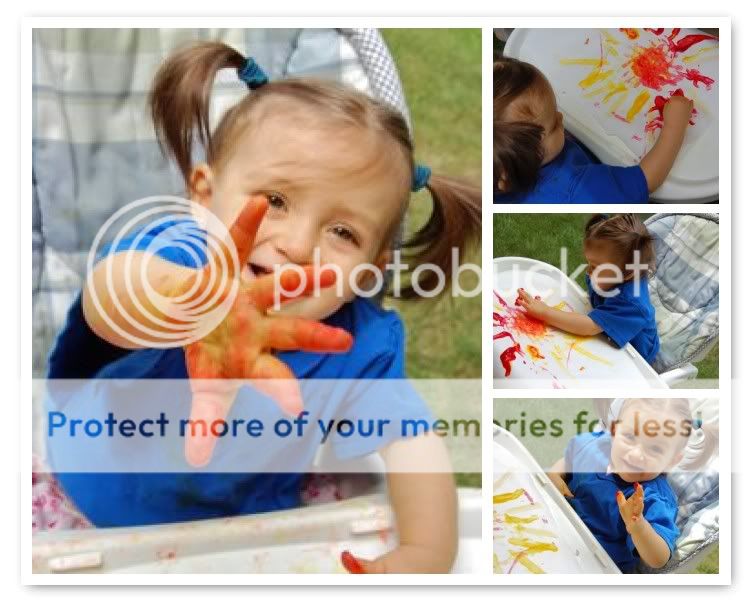
...she took off finger painting on her own! Lots of squeals and giggling!

Then both girls decided to paint together...


So much fun!!

Sunday, August 30, 2009

Saturday, August 29, 2009

Bacon Bowls -- Hey, there is something green in my bacon!

If there is one thing our entire family can agree on, it's our love of BACON! In fact, bacon played a crucial role during the courting phase of my relationship with Mark. At the time, I was a strict vegetarian, but I kept packages of bacon in the fridge of my dorm room as "Mark bait". It worked!!

Emily and Clara have also tested bacon-positive.

The idea for these bacon bowls came from an old post on Not Martha, however my method is slightly different from hers. This combines basket-weaving and bacon... it's like crafting with food! (er... make that a food-like substance.) It's no surprise that these bacon bowls were a big hit in our household!

Here are some ideas for bacon bowls:

Fill with lettuce, tomato, and ranch dressing. The lettuce and tomato make this a healthy snack. (Ahem.)

Or fill with scrambled eggs for breakfast! Wouldn't this be a unique appetizer for a brunch?


To make your own bacon bowls, you will need a package of bacon, and small microwave safe dish, kitchen scissors, and a glass baby food jar.

Clean the baby food jar very thoroughly and be sure to remove all adhesive from the label. Place the baby food jar upside down on the microwave safe dish.


Lay two pieces of bacon to make an "X" over the bottom of the baby food jar as shown. Use kitchen scissors to trim the ends.


Next, weave slices of bacon around the ends. Are you getting hungry yet?? Wait for it... wait for it.... it gets better!


Cover the entire thing with a wet paper towel, and place in the microwave for about 4 minutes and 30 seconds total, checking after every minute. Microwave times vary, and ours is DIEING a slow and painful death, so yours may cook up much faster.


Set aside and allow to cool. Carefully pull the bacon bowl from the baby food jar, and fill with salad or eggs.

Time for the taste test.....


Success!!!!

Friday, August 28, 2009

Poor Man's Planetarium

It was a cloudy, wet, and rainy evening here. That didn't stop us from doing a little star gazing!


The stars were so close... we could almost reach up and touch them!

Coming up... more fun reviews/giveaways from our new sponsors, including some delightful pretend play toys from www.AllChildrensFurniture.com. Their website features fabulous children's bedding, small kids decor items, adorable kids chairs, toys, games, and more! Be sure to check back!

Sewing in Baby Steps ... the Workbook!

If you always wanted to learn how to sew, but were too afraid or intimidated, this is the workshop for you. The Sewing in Baby Steps workbook is designed to teach you how to sew one baby step at a time.

Add to Cart

The workbook is divided into 13 days. Each day contains a short baby step assignment with detailed instructions to help you complete the task. By the end of the workbook, you'll have sewn a reusable drawstring produce bag and matching shopping tote, and you'll be on your way to sewing other fun projects!

You can complete one baby step each day, as intended, or one baby step each week. The workbook is designed to be done in your own time and at your own pace.

Who is the workbook for?

The workbook is intended for:
  • those who are completely new to sewing.
  • those who have sewn previously, but need a quick refresher on how to get started.
It is not intended for those with extensive previous sewing experience.

Add to Cart

What materials will I need?

Here's what you'll need to get started:
  • Sewing Machine
  • Multipurpose Thread
  • Empty Bobbins
  • Scrap Fabric
  • Scissors
Here's what others are saying:
"I finally took step 1 yesterday, and I have to say I already feel such success. You were spot-on with the need to dust my machine. Thank you so much for encouraging me to actually DO something with the sewing machine I begged my husband for over three years ago!" --Sadia
"I wanted to thank you so much for the Sewing in Baby Steps Workshop......The information was great, the pacing was perfect, and I really got acquainted with my machine and how it works......Thank you....." --Kimberlee
Download Your Copy of Sewing in Baby Steps for $5.95

That is less than $0.50 per day and it is available for immediate download by clicking the add to cart button below. Are you excited? You're going to learn how to sew!

Add to Cart

Thursday, August 27, 2009

Sponsor Giveaway -- UPrinting.com 500 Business Cards

It seems as though every time I prepare a craft segment for The 10! Show, show up at a MOMS® Club meeting, or just take the kids to the playground, someone will ask for my business card.

"Umm... I don't have one. Do you... have.... a sheet of paper..???"

Talk about major embarrassment!

Fortunately, UPrinting.com contacted me to offer a 500 business card giveaway to 2 lucky readers -- so you don't have to suffer in shame like I did! I love giveaways, don't you??

One winner will receive:

500 Business Cards

Choose size: 2x3.5”, 2x3”, 2x2";

Choose paper: 14pt cardstock (matte or gloss coating) & 13 pt cardstock uncoated

Choose Color: (4/4) Color both sides; (4/1) Color 1 side , B/W backside; (4/0) Color 1 side, black backside

UPrinting.com offers high-quality die cut business cards. They are beautiful! Their cards are printed with soy/vegetable based inks, and made with recycled - FSC/SFI certified stocks. If you win, you can choose between 3 different business cards sizes!

To enter for your chance to win, leave a comment on this post describing how you would use these cards. Be sure to include your email address in the comments field! Maybe set up some Mommy Playdate Cards, promote your Etsy business, or use them to spread the word about your blog.

Giveaway ends Wednesday, September 2 at 6:30pm EST and winner will be chosen by random.org. Offer is valid for United States Shipping only, and shipping is to be paid by Winner.

Good luck!!

Wednesday, August 26, 2009

Pillowcase Pajama Pants

Emily loves that her new pajama pants are so soft and comfy, since I made them from an old pillowcase. I used a technique very similar to the one found in The Creative Family by Amanda Blake Soule. These were made in just a few minutes! By using the existing hem on the pillowcase, I did not have to sew bottom hems for the pants -- plus I like the decorative edge. I used a pair of Emily's elastic pants as a pattern.

I'll be making a few more pairs of these!

If you don't know how to sew, but would like to learn how, you can sign up for my free online sewing workshop -- Sewing in Baby Steps! I can't believe how many of you have already signed up...Wow! It's going to be so much fun!!

Tuesday, August 25, 2009

Light-Up Fireflies

This was a fun before-bedtime craft that Emily enjoyed. It's easy, and mess-free too! She loved seeing all the fireflies light up in the picture!

To make your own light-up fireflies, you will need: black construction paper, yellow tissue paper, scissors, chalk, and tape.

Cut holes out of the black construction paper for the bodies, and invite your child to draw wings and antenna using chalk.


Next, flip the paper over and cover the holes with yellow tissue paper. Attach with tape as shown.

Hold the picture up to a light source and the fireflies will light up!

So much fun!! The perfect bedtime story to go along with this... The Very Lonely Firefly by Eric Carle.

Monday, August 24, 2009

Easy Flower Painting

We have been enjoying these beautiful little pockets of time when Clara is taking a nap (hooray for naps!) and Emily and I find a fun project to work on. Emily enjoyed this simple painting project so much that she made two of them!

To make your own flower painting you will need: a cork, some paint, and some heavy-weight paper. Invite your child to make flower prints on the paper using the end of the cork as a stamp. The first time Emily did this, she made so many flowers they completely covered the paper! The second time she decided to focus on only three flowers, but added stems and grass to them.


She was so proud of her painting, and asked if she could show it to Clara when she wakes up!

Sunday, August 23, 2009

Saturday, August 22, 2009

DIY Reusable 2-in-1 Sandwich Wrap and Placemat

Here's a quick eco-friendly weekend project, just in time for back-to-school! These reusable sandwich wraps/placemats are made from cereal box liner bags and a little fabric. Mark made fun of me for saving these cereal bags, but I just knew I could find a way to reuse them. I made these sandwich wraps using some of this fabric from the thrift store. To save time, I found the easiest way to make these is to use a serger.

[Important Update: A kind reader has informed me that most cereal bags are sprayed with BHT. To avoid any BHT issues, be sure to re-use cereal bags from an organic cereal only! Thank you, Alicia!!]

Open your cereal box liner bag so it lays flat. Using this as your pattern, pin it to some cotton fabric and cut around the fabric.


Use a serger to make four seams (one on each side) through both the cereal bag and the fabric. Be careful to cut the glued edge off of the cereal bag, since you don't want that showing up on your pretty sandwich wrap!


Place a couple of slices of bread in the middle of your wrap (cereal bag side up) and use that as a guide for applying your velcro. I used self-adhesive velcro, although sew-on velcro would probably work better.


Now, flip the wrap over then apply velcro to the other sides as shown.


It should look like this!


Open it up.....


...and enjoy lunch on your placemat!

Emily said these are like opening a new present every time she has lunch! I made two of these in just a few minutes. I would have made more, but Mark needs to eat more Cheerios.

Since we are on the topic of eco-friendly things, I also wanted to mention that the winner of the EcoStore USA Giveaway is Petula from It's a Woman's World!! Congratulations, Petula!

Also, be sure to check out EcoStore USA's BOGO sale going on now until August 31st. They always have free shipping on orders of $25 or more.

Friday, August 21, 2009

Crafting with Recyclables - Napkin Rings

Here's a craft that is sure to make meal time just a bit more fun! Emily fell in love with this cherry-printed ribbon the minute she first saw it. The red napkins were a clearance bargain from Target during their after-Christmas sale.

To make your own napkin rings, you will need a paper towel roll, scissors, some ribbon, and a bit of tape. Mark your paper towel roll where you want to cut to make each napkin ring. Ours were 1 1/2" wide. Cut the roll with scissors using the lines as your guide.


Invite your child over to decorate the napkin rings with their artwork. We used markers, although paints would work very nicely for this as well. Just be sure to allow them to dry completely. This was Emily's favorite part!


Add a bit of ribbon to each napkin ring and secure with a piece of tape. That's it!


I love how her scribbles peek out from underneath the ribbon. So cheerful, and so easy to do! Have fun!!

Thursday, August 20, 2009

Laundry Day Fun!

While I was tackling the laundry this afternoon, Emily did some of her own. Somehow her laundry was a lot more fun than mine! Special thanks to Elise of Inspiration Surrounds... Creativity Abounds for reminding me of this fabulous activity. When I was a little girl, our family gave my cousin a play laundry set much like this one, and she absolutely loved it! Emily also enjoyed hers very much!

We gathered items we already had around the house: some buckets, clothes pins, a few yards of laundry line, a tiny version of a laundry basket, and a box of play laundry soap made from an empty Jell-O box. I sewed a small drawstring bag to keep the line, pins, and play laundry soap in. I stamped the words "wash day" on it using a fabric-safe ink pad. We used bubble bath instead of laundry detergent, and it worked very well!

This was so much fun, and kept Emily well occupied while I got my own laundry done!


She was so proud of herself, and she keeps going outside to see if her laundry has dried yet!
Related Posts with Thumbnails