Showing posts with label knitting. Show all posts

Sunday, November 29, 2009

Back to Knitting -- Free Easy Pattern

I knitted this hat for Clara from 1 skein of Lion Brand Nature's Choice organic cotton yarn purchased at JoAnn with a 50% off black Friday coupon for just $3.25. Bargain! The hat was a quick and easy knit, and is the perfect weekend knitting project! I even had enough yarn leftover to crochet a small dishcloth. The pattern for the hat is below... and it's free!


Free Toddler's Hat Pattern by Valerie @ Frugal Family Fun Blog!!

Finished hat is size 2T.

Materials:
US size 9 knitting needles (5.5 mm)
1 skein Lion Brand Nature's Choice Organic Cotton Yarn
1 yarn needle

Gauge: 16sts, 21 rows = 4" x 4" square

Directions:

Cast on 64 stitches.

Knit 5 rows.

* Purl next row. Knit next row. Repeat from * until hat measures 9 inches in length. End on a purl row.

* Knit 6, knit 2 together. Repeat from * to end of row.

* Purl 3, purl 3 together. Repeat from * to end of row. Do not cast off.

Leaving a long yarn allowance, cut yarn and thread the end through a yarn needle. Thread yarn through remaining stitches on knitting needle. Remove knitting needle and pull tightly. Sew side seam and finish off.

Clara has been wearing her new hat indoors and out! Next on the needles.... a hat for Emily!

Wednesday, September 16, 2009

DIY: Bamboo Knitting Needles

The arrival of Fall always makes me want to start knitting again, and I love the feel of bamboo knitting needles (although the store-bought ones can be rather pricey). Fortunately, I found an easy, and practically free way to make your own! These would make such cute gifts for any avid knitter.

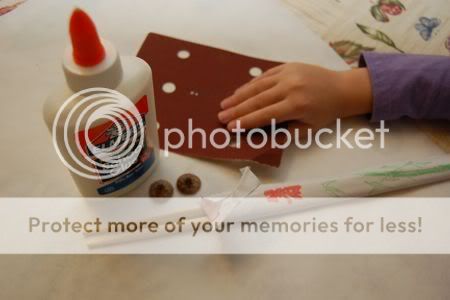
To make your own knitting needles, you will need: glue, acorn caps, sandpaper, and some leftover chopsticks from your favorite Chinese take-out place. I was going to attempt this project on my own, but when Emily saw what I was up to, she wanted to help too!


First, use a pencil sharpener to make the ends of the chopsticks extra pointy.


Then, use the sandpaper to make the edges of the chopsticks extra smooth. This is important for the yarn to glide easily over the needles.


Next, attach the acorn cap to the flat end of the chopstick with a little glue.


You may need to hold the acorn cap in place for a short while. Then, we placed them pointy-ends down in a glass jar to dry completely.


You can use a fine-line marker to make funny faces on them!

I tried them out, and they work very well! Happy knitting!

Related Posts with Thumbnails