Showing posts with label tutorial. Show all posts

Saturday, April 3, 2010

Weekend Rewind -- Make Kites, Not Friends

It's time for another fun post from the archives. Here's an activity we plan to do again this weekend! The kites were A LOT of fun! The snooty moms at the playground, not so much, but it made for an interesting story. Wishing you and your family a wonderful Easter weekend!

Today's post was going to be all about making kites, and how we followed this great tutorial from maya made showing how to make your own kite. Not just any kite, mind you, but the best damn kite ever!

I'm planning a similar activity for my MOMS Club, so I thought I would take the girls over to the playground for a "test run". The girls and I were having a fabulous time, and the kites flew really well.

Then something weird happened. Two moms and their kids walked over to the playground from the apartment complex near my house. I thought it would be nice to see if they would like to join us. After all, it is a beautiful day, perfect for flying kites, and I had plenty of materials for all of us. So I walk over to them, smile and say hello, and asked if they would like to build some kites with us. No response, and get this -- they both completely looked the other way!!! What is up with that????

Now that I'm officially a victim of complete playground rejection, I just don't understand it. I mean, what is the point? I always felt that being a stay-at-home mom meant that we were all in this together, and should try to support one another as best we can. I know a lot of us complain that it is difficult to meet other moms, or have a social life, in general. But when someone takes the time to be friendly and approach you, do you react this way? No!

I hoping maybe, just maybe, this was all some stupid misunderstanding. Like maybe when I asked if they would like to build kites, they heard, "Would you like a steaming hot bowl of herpes?". Or perhaps, as my friend Jenny Henny suggested, they don't speak English. I like to give people the benefit of the doubt, but I have to say, this was a bit of a blow.

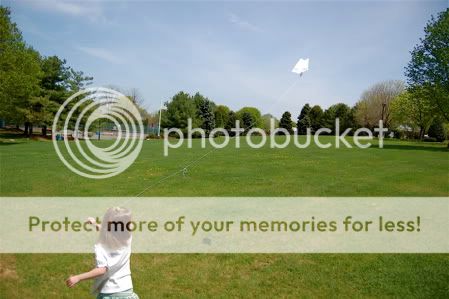
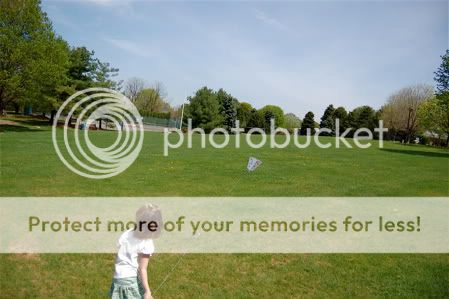
Now, about the kites. Let me tell you, they are super-easy to make, and they fly very well -- even with just a slight breeze! Emily liked running back and forth with hers in the field.

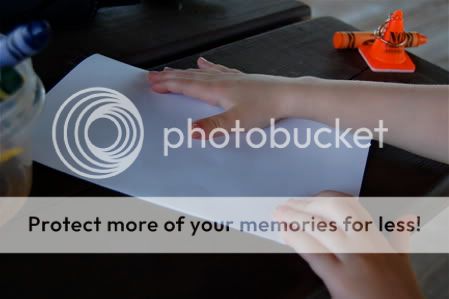
Here's how to make your own kite: First, fold your paper in half, like this.....

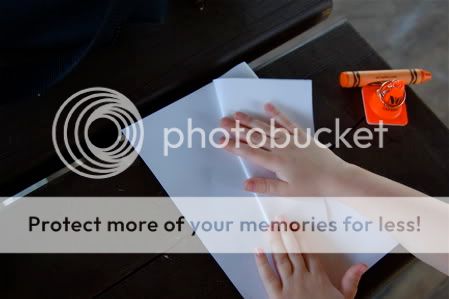
Next, fold the flaps over on an angle, like this.....

Then, add a bamboo skewer to the back like this. Attach with tape.


Punch a hole in the kite, along the fold, to attach the string.


Fly, and enjoy!
I can guarantee the kite will fly. However, no guarantees that it will make you any new friends.... sorry!
Monday, December 14, 2009

Napkin Doll Tutorial -- Guest Post by Mark!

Back in October, our family made a Princess and the Pea Play Set as a birthday gift for one of Emily's friends. For the doll, Mark created a miniature version of his napkin dolls, and I have since received numerous requests for a tutorial on how to make the doll. I must have bugged Mark enough that he agreed to do a guest post here. Please give him a warm welcome!


Have you ever been in a restaurant with small children, and the food is taking forever to arrive? Did you forget things for the kids to play with? Worry not!


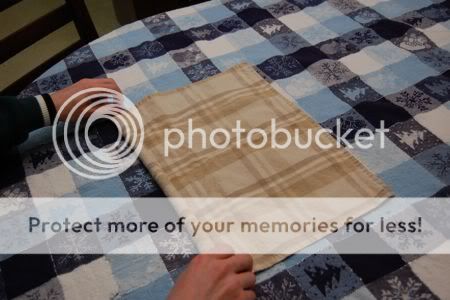
  • Take an ordinary cloth napkin, and lay it flat.

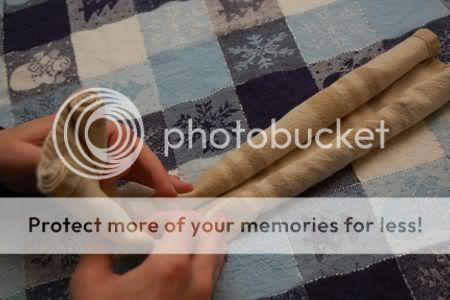
  • Roll up one side of the napkin, until you reach the middle.

  • Roll up the opposite side, until you meet the first side in the middle.


  • Take one end....

  • ...and fold it over the other, as shown.

  • Spread it out a bit so that the piece in your hands overlaps the rolled portion on the table.

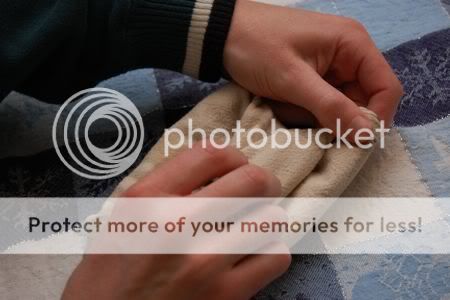
  • Holding the piece you just folded up, pull the inner rolled portion down. Look at the next picture if this is confusing.

  • Those little pieces sticking out there will become the legs.


  • Grab the "arms", and pull them around to the back of the doll's body.

  • Now, grab the center of each arm roll and pull it out a bit to lengthen the arms. It should look a little bit like a cinnamon roll.

  • Now that the arms are longer, simply tie them in a knot. Not a full knot, but just like you are starting to tie your shoes.


  • Give the arms a strong tug to straighten them out and...


  • TA-DA!

Wow! Your child will be amazed, and the waitress will ask you for your phone number. Go ahead and give it to her. When the waitress leaves, your wife can (read: will) slap you. Keep the waitress' number. **ouch!! VALERIE!!**


If your child spills something, just wipe it up with the doll's head, as it is quite absorbent.


Thursday, December 10, 2009

Handmade Holidays -- Felt Fairy House Tutorial

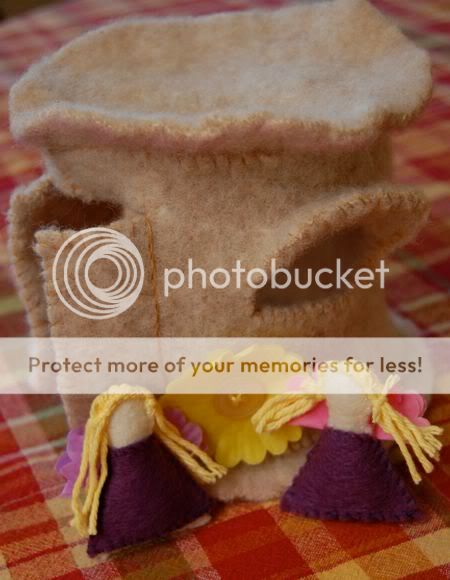
This little fairy house was an impromptu sewing project for two sweet girls (sisters) we were lucky enough to meet for a play date this afternoon. In mind was this fairy house from Imagine Childhood. Ours was made from this felted wool sweater, some other pieces of felt, a tiny bit of yarn, some buttons, and a few flowers from a lei kit. It was a great hit with the girls, and of course it was super-frugal (and fun) to make!

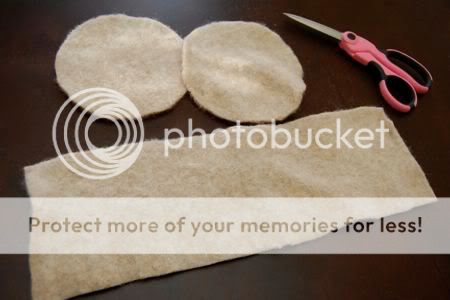
First, cut out your pieces of felt from a felted wool sweater. If you don't know how to felt a wool sweater, click here. You will need two 6" diameter circles, and one 15" x 5" rectangle. Or use whatever dimensions you want to make. I promise the fairy police will not come to your house and arrest you, so go crazy! I'm merely giving these dimensions as a guideline.

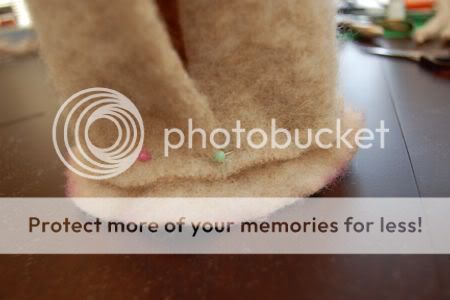
Next, pin the rectangular piece around the circle piece as shown. Whip stitch into place. To see a video demonstrating how to do a whip stitch, click here. This will be the floor of the fairy house. Do the same with the other circle piece. This will be the roof.

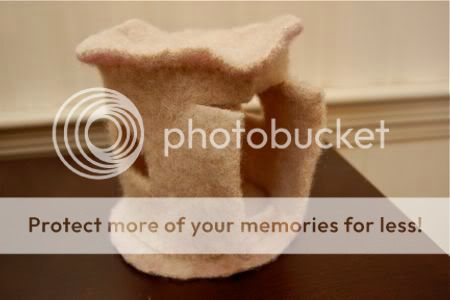
Cut out windows and doors. I just eyeballed it. Because I'm crazy, and live on the edge!
Whip stitch around the windows, and doors. Add awning to the windows, if desired. In our case, it was very much desired to have awnings on the windows. When we got to this point, I could not keep Emily from playing with this fairy house. It was like trying to hold back the ocean.


Decorate your fairy house with flowers! We used flowers from a lei kit and buttons for the centers. Very easy!

Of course, every fairy house needs fairies!!! I cut these shapes from felt for the body. Whip stitch the front and back together and leave a space for stuffing. Stuff the body and whip stitch closed.

I used a flower from the lei kit folded in half as wings, attached a dress, and stitched on some yarn for hair.

Play time!!!!


A few things I noted while working on this project:
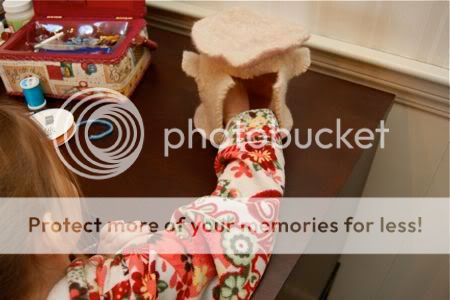
:: I wish I had added a handle to the roof. It's the perfect size for the girls to tote around from room to room, and a handle would have been an easy addition.
:: I was surprised how sturdy the felt held up. I used a thick sweater, so that may have helped.
:: When we gave the girls some cotton balls, the fairies magically turned into snow fairies. So much fun!!


I listed this post on:
and

Saturday, November 7, 2009

Macho Manly Man Pocket Hand Warmers for Men

This little project combined two activities Emily has asked if we could do recently, but I had to give the "yes, we will do that later" answer. A good tip -- Keep a list of requests your child makes to be done "later". When boredom starts to creep in, break out the list! In this case, Emily had been asking if we could 1. Make hand warmers. and 2. Leave a surprise in the mailbox for our letter carrier. So today, we made hand warmers for our letter carrier!


While working on this, it occurred to me that men are particularly hard to shop for, and even more difficult to craft for. I think they would be great for all the manly man things that men do (ie. shoveling the walk, taking out the garbage, going to football games, fishing, or hiking). Place in the microwave for 30-45 seconds, remove from microwave, and warm your hands! They also double as cold packs for bumps and bruises if kept in the freezer. If you don't have the time to sew, there are a couple of these available in our new Etsy shop!

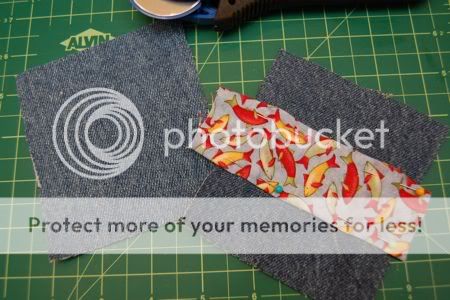
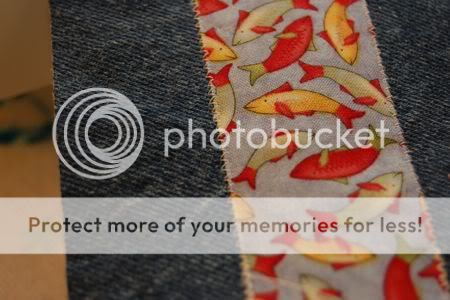
To make your own macho manly man pocket hand warmers for men, cut two pieces of generously sized 4 x 4 1/2 inches of denim. We recycled a pair of mens jeans for this! I used manly fish-print fabric for one side. Fold the top and bottom sides of the fabric and pin into place.


Zig-zag stitch along the fabric.


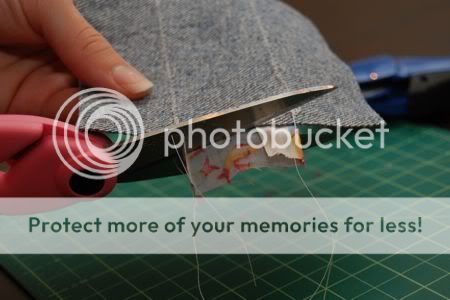
Trim excess fabric.


With right sides of denim together, stitch three sides closed. Be sure to leave an opening for turning and filling with rice!


Leave an opening, as shown.


Flip right-side out, and gently poke corners out with a chopstick or knitting needle.


Fill with rice! We couldn't find a funnel, so Mark made another paper cup and we cut off one of the bottom corners.


Attach instruction card....


...and give to someone special!


For other projects we've done with old jeans, you can check out these baby bibs, lunch sacks, or this no-sew wall organizer.

Friday, October 30, 2009

Super Easy Marshmallow Pumpkins

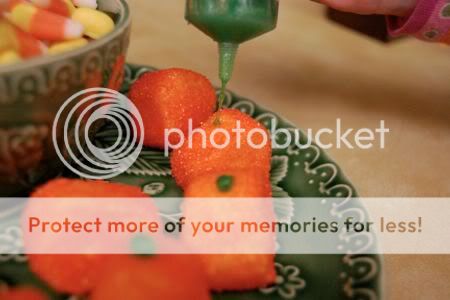
Emily and I did some Halloween "baking" this afternoon. She thought these marshmallow pumpkins were the coolest thing, and they were super-easy to make. Each marshmallow makes two pumpkins. Very frugal! She made these with very little help from me whatsoever.

For a slightly healthier option, try slices of banana instead of marshmallows. I say, go for the marshmallows! After all, Halloween only comes but once a year.


Begin by cutting each large marshmallow in half. It is scientifically proven that when you cut sweets in half all of the calories spill right out.


Poke the marshmallow through a skewer.


Let the marshmallow go for a quick swim in a small bowl of water.


Cover with orange decorating sugar! Emily did a happy dance when we got to this step, and I think a happy dance is mandatory for this activity. It makes the marshmallows taste a little better.


Use green icing to make stems.


The taste test results..... success!! Nom nom nom!

Tuesday, October 27, 2009

Last-Minute Goody Bags from an Envelope

Emily asked if we could make some special Halloween goody bags to give out to her friends, but I am too lazy (and far too frugal) to go to the store and spend money on goody bags. In the end, she liked these handmade ones so much better! I think they would be perfect for last-minute party favors, but we've been battling some colds around here, so no parties for us anytime soon. Boo hoo! Grab some business-sized envelopes, enlist the help of the kids, and make your own goody bags in seconds. (Well, maybe a bit longer if you waste time tearing the house apart looking for envelopes because you can't remember where you last placed them and you're certain that the baby must have walked off with them... Not that it has happened to me, or anything.... I was... um... I was just sayin'.)

Here's how to make your own:

1. Seal the envelopes.


2. Cut each envelope in half to make two goody bags. Yes, two goody bags from one envelope. So thrifty, right? Start with one half, and fold along what was the side of the envelope, about 1/4 inch in. This will now be the bottom of the goody bag. Unfold, and then fold along the top and bottom 1/4 inch of the envelope as shown.


3. Pop open your envelope to form your goody bag. My, aren't you crafty??


4. Here's what the bottom of the bag should look like.


5. For the candy corn, cut out strips of colored construction paper and glue together as shown.


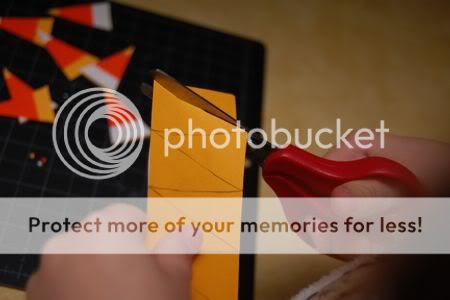
6. Cut out triangles, as shown. (Great for the little ones who are just getting used to scissors!)


7. Attach to the bag, fill with candy, and pass out to friends!


Related Posts with Thumbnails